
Removing a Popcorn Ceiling Safely
Before anyone scrapes a popcorn ceiling, a lab should check it for asbestos. The test, the containment, wet scraping of painted and unpainted texture, repairing and finishing the bare ceiling, and covering it with new drywall instead.
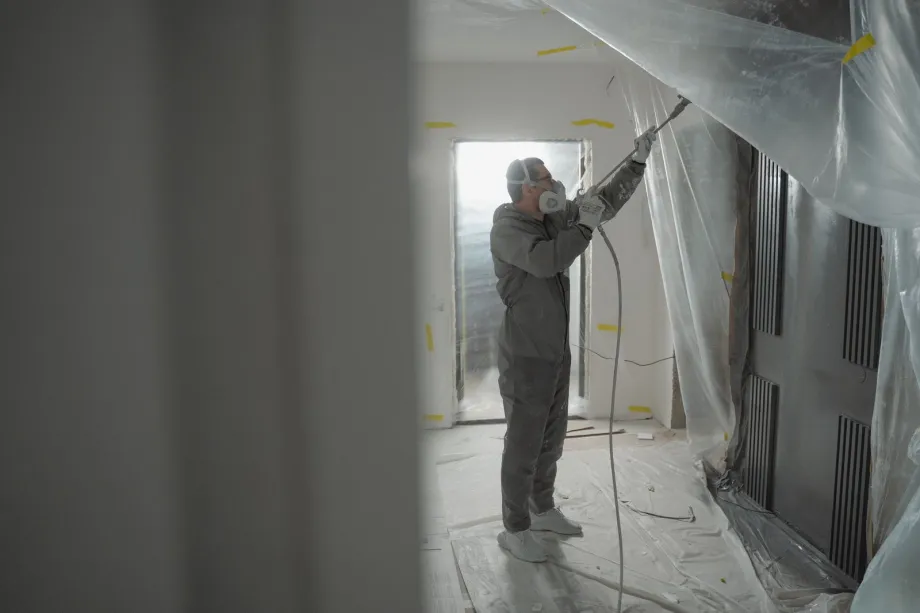
Asbestos testing and safety protocols
Textured ceilings installed prior to the mid-1980s frequently contain asbestos, a mineral fiber regulated by the Environmental Protection Agency due to serious respiratory health hazards. Scraping or sanding asbestos-bearing material releases microscopic fibers into the air that remain suspended for long periods.
Before starting prep work or buying tools, test the ceiling texture. Sampling kits are available online and at home improvement centers. Turn off ventilation, spray a small section of texture with water to limit dust, and cut a sample down to the drywall substrate. Place the sample into a sealed plastic bag and send it to an accredited laboratory for testing.
If the result is positive, do not scrape or sand. Removal belongs with a licensed asbestos abatement contractor, who seals the room under negative air pressure, works in proper respirators and disposes of the waste as the law requires. The rules for homeowners working on their own houses vary by state, but uncontrolled removal can contaminate the whole house.
If the test is negative, proceed using personal protective equipment. Wear a tight-fitting N95 or P100 respirator, sealed safety goggles, and disposable coveralls. Keep the work area ventilated to the outside while keeping interior ductwork sealed.
Room preparation and dust containment
Popcorn ceiling removal creates heavy waste. Dry texture crumbles into fine dust, while wet texture forms a sticky slurry. Proper containment protects flooring, walls, and HVAC systems.
Clear the room completely before starting work. Remove furniture, window treatments, rugs, and light fixtures. Wrap any immovable fixtures in heavy plastic sheeting and seal them with painter's tape.
Cover the floor with thick polyethylene sheeting, overlapping and taping the seams. Run plastic sheeting four to six inches up the walls to create a basin that catches falling debris. Place drop cloths over the plastic layer to prevent tear-throughs from ladders.
Turn off the HVAC system. Cover all supply vents, return grilles, and wall outlets with plastic sheeting and painter's tape to keep dust out of ductwork.
Electrical safety around ceiling fixtures is critical. Shut off power to the room at the main circuit breaker panel. Remove ceiling lights and fans, then verify power is off with a non-contact voltage tester. Cap open wire ends with wire nuts, push them into junction boxes, and cover the boxes with tape.
Assessing painted versus unpainted texture
The presence of paint determines how easily texture strips off. Unpainted texture uses water-soluble binders. Painted texture has an acrylic or oil paint layer sealing the surface.
Mist a small area with warm water from a hand sprayer and wait a few minutes. If water soaks in and softens the texture to a slushy consistency, the ceiling is unpainted. Unpainted material scrapes off cleanly with light pressure.
If water beads up or runs off, the ceiling is painted. Paint creates a moisture barrier that prevents water from reaching the binder underneath. Scraping painted texture requires scoring the paint film with a scoring tool so water can penetrate, or using chemical strippers. If painted texture adheres firmly, covering the ceiling with new drywall is often more efficient than forced scraping.
Wetting and scraping techniques
For unpainted ceilings, controlled wetting is the most effective removal method. Fill a garden pump sprayer with warm water and a splash of liquid dish soap to help water penetrate the material.
Spray a section a few feet square. Wet the texture without soaking through to the drywall paper, because too much water softens the board and tears the face. Give it time to absorb.
Use a wide drywall knife or a ceiling scraper held at a low angle. Push the scraper forward in smooth strokes to lift texture away from the paper backing. Avoid digging sharp blade corners into the drywall.
Work across the ceiling section by section. Clear fallen texture off floor coverings periodically to maintain a clear workspace and keep weight off the plastic sheeting.
Repairing and smoothing the drywall base
Scraping rarely leaves a flawless surface. Older ceilings often feature unfinished joints, exposed fasteners, small scraper gouges, or uneven tape seams beneath the original texture.
Let the ceiling dry, overnight at least, after scraping. Inspect the surface under bright lighting, holding a work light parallel to the ceiling to highlight imperfections and raised edges.
Fill gouges, scratches, and recessed fastener heads with joint compound using a six-inch taping knife. If original drywall tape is loose or damaged, remove the loose piece, apply fresh joint compound, and embed new paper tape.
For a flat surface, apply a thin skim coat of joint compound over the entire ceiling using a twelve-inch drywall knife. Spread the compound smoothly to fill low spots and conceal minor imperfections. Let the skim coat dry completely.
Sand the cured compound smooth using medium-grit sandpaper on a pole sander, followed by fine-grit sandpaper. Wear a respirator during all sanding operations. Wipe away residual dust with a damp microfiber cloth.
Priming and painting the finished surface
Raw drywall paper and joint compound absorb paint at different rates. Skipping primer causes visible flashing, uneven sheen, and peeling paint over time.
Apply a high-quality stain-blocking primer across the entire ceiling. Oil-based or stain-blocking acrylic primers seal bare compound, block water stains, and stop paper dyes from bleeding into the topcoat. Roll primer evenly using a medium-nap roller cover and allow it to dry according to product instructions.
Inspect the primed surface under strong light for remaining defects. Touch up minor flaws with compound, sand lightly, and spot-prime those areas.
Finish with two coats of flat ceiling paint. Flat finishes diffuse light, hiding minor surface irregularities that satin or semi-gloss paints expose. Paint in parallel strips across the short width of the room, keeping a wet edge to prevent lap marks.
Alternative solution: covering with new drywall
When texture has several coats of paint or covers badly damaged drywall, covering it with thin drywall is often easier than scraping. If the texture contains asbestos, get advice from an abatement professional first, because driving screws through it disturbs the material.
Locate ceiling joists using a stud finder and mark their positions along the top of the walls. Select one-quarter-inch or three-eighths-inch drywall panels to minimize added weight and preserve room height.
Raise the panels against the popcorn ceiling using a drywall lift. Fasten the sheets to the joists with drywall screws long enough to pass through the old ceiling and bite well into the framing, spaced closely along each joist as the board maker specifies for ceilings, and stagger the end joints. Tape all seams with paper tape embedded in joint compound. Apply two to three coats of compound over joints and screw heads, feathering edges outward. Sand smooth, prime, and paint as you would any new drywall surface.
Frequently asked questions
Should popcorn ceilings always be tested for asbestos before removal?
Yes, if there is any chance it went up before the mid-1980s, and test it if you do not know its age. Textured ceilings from that era can contain asbestos, which becomes a hazard once it is disturbed. A small wetted sample sent to an accredited laboratory, or a visit from a certified inspector, settles the question.
What is the best way to scrape unpainted popcorn texture?
Mist a small section with warm water, give it time to soak in and soften, then scrape with a wide knife held at a low angle so the corners do not dig into the drywall paper. Wetting also keeps the dust down.
Can you remove popcorn ceiling texture if it has been painted?
Painted texture resists water penetration, making standard wet scraping difficult. Scraping painted texture requires scoring the paint layer first or using specialized stripping products. Installing thin drywall over the painted texture is often a cleaner solution.
Is it better to cover a popcorn ceiling with new drywall instead of scraping?
Covering the existing ceiling with thin drywall panels saves labor when dealing with painted texture or minor surface flaws. This approach encapsulates the old surface completely and creates a brand-new flat surface for joint compound and paint.