
How to Paint Kitchen Cabinets So the Finish Lasts
Painted cabinets chip and peel when the grease stays on, the gloss is not broken or the doors go back up too soon. The full sequence from labeling doors to cure time, the paints that hold up to hands and cleaning, and when painting is the wrong fix.
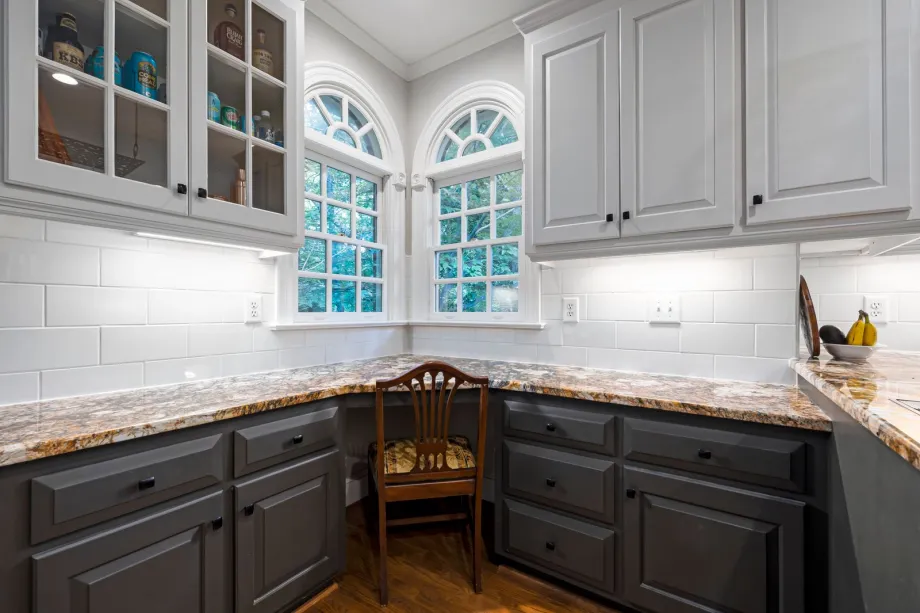
Kitchen cabinet painting fails most often because of skipped preparation rather than bad paint. Before opening a single paint can, remove all cabinet doors, drawer fronts, and hardware. Do not leave hinges attached to frames or doors. Painting around hinges gums up the mechanisms, leads to paint peeling off metal, and creates sloppy edges.
Label every door and drawer front with its opening, because doors that look identical rarely hang the same way twice. A simple system uses painter tape inside the hinge cup holes or underneath drawer bottoms with a numbered grid map of the room. Store screws, hinges, shelf pins, and handles in labeled plastic bags to keep hardware organized during the process.
Cleaning and surface preparation
Grease and cooking oils accumulate on kitchen surfaces, especially around stove areas and upper doors. Standard sanding drives oil deeper into the wood grain or existing coating, which ruins paint adhesion. Clean every surface with a strong degreaser, such as a TSP substitute or a cleaner sold for paint prep. Scrub with a green scouring pad, rinse with clean water, and let the wood dry completely.
Inspect the wood for damage, gouges, or unwanted hardware holes. If you plan to install modern handles with different hole spacing, fill the old screw holes with two-part epoxy wood filler or high-density wood putty. Standard spackling compound is too soft for cabinet hardware locations and crumbles under pressure. Overfill the holes slightly, let the compound cure, and sand it flush with the surrounding surface.
Managing oak grain and wood texture
Oak cabinets have deep pores that remain visible through thin paint layers. Paint alone will not create a smooth, flat surface over oak. If you want a smooth cabinet face, apply a wood grain filler or a trowelable paste filler across the entire door surface. Work the filler across the grain to pack the pores, scrape off the excess with a putty knife, and sand smooth once dry. If you prefer the natural look of wood texture, you can skip the grain filler, but the wood pattern will show under the finish coat.
Sanding and primer selection
Once the surfaces are clean and filled, perform a scuff sand on all doors, drawers, and frame faceplates. Use 180-grit to 220-grit sandpaper or fine sanding sponges. The goal is not to strip the wood bare, but to dull the gloss of the original finish. In a house built before 1978, test old painted cabinets for lead before sanding them. Sanding creates micro-scratches that give the primer a mechanical grip. Wipe away all sanding dust using a microfiber cloth or a vacuum with a soft brush attachment. Avoid tack cloths containing wax if you plan to use waterborne paints, as wax leaves residue that causes defects in the topcoat.
Ordinary wall primer is not enough on cabinets. Use a dedicated bonding primer designed for slick, hard-to-paint surfaces. Oil-based primers and shellac-based primers are effective for sealing wood knots, blocking tannin bleed through oak or pine, and adhering to tough varnishes. Shellac primers dry rapidly and block strong wood oils, though they require alcohol for cleanup. Waterborne bonding primers are easier to clean up with water and produce lower chemical fumes. They perform well on thoroughly sanded surfaces, though some wood species require stain-blocking water-based formulations to stop wood tannins from yellowing the final paint layer.
Apply one even coat of primer, allow it to dry according to the product guidelines, and sand lightly with 220-grit paper to remove any raised grain or dust nibs.
Paint chemistry for kitchen cabinets
Wall paint or standard interior latex paint is soft and flexible. It cannot withstand grease, sweat from hands, frequent scrubbing, or impact. Kitchen cabinets require hard-drying, durable coatings specifically formulated for trim and cabinetry.
Urethane-modified acrylic enamels are a primary choice for cabinet refinishing. These paints clean up with water like latex, but cure to a hard finish similar to traditional oil-based enamels. They resist yellowing over time and feature strong self-leveling properties, which helps smooth out brush strokes as the paint dries. Traditional alkyd or oil-based enamels provide extreme hardness, but white and light shades tend to turn yellow in low-light kitchens over time.
Application methods: spraying vs. roller and brush
Airless or High-Volume Low-Pressure sprayers offer the smooth finish typical of factory-manufactured cabinets. Spraying eliminates brush marks entirely and covers detailed door profiles quickly. However, spraying requires extensive preparation. You must construct a spraying area, wear proper respiratory protection, and carefully mask off appliances, walls, and flooring inside the kitchen.
Using a brush and roller takes longer to apply, but requires far less masking setup. Use a high-density microfiber roller cover or a fine-finish foam roller to lay down the paint, then immediately back-brush detailed profiles using a synthetic brush designed for enamel paints. Quality urethane enamel levels out as it dries, minimizing visible roller stipple and brush lines. Apply two thin topcoats rather than one heavy layer, sanding lightly between coats after the paint dries completely.
Cure times and reassembly
Dry time is not the same as cure time. Paint dries when its liquids evaporate, making the surface dry to the touch within a few hours. Curing is the chemical process where the paint reaches its full hardness and moisture resistance.
Give the doors the time the label asks for before attaching hardware and rehanging them, and handle them by the edges. Full hardness takes much longer, and cool or humid weather stretches it further. During this window, avoid washing the surfaces with soap or water, do not slam doors, and avoid hanging damp towels over cabinet fronts.
What to expect from painted cabinets in daily use
Painted cabinets require different care than factory laminate or natural stained wood finishes. While urethane enamel coatings are hard, they can still chip if hit hard with metal pots or sharp objects. Sweat and natural skin oils around knobs can break down paint films over several years if handles are skipped or installed improperly. Clean painted cabinets using soft microfiber cloths with warm water and mild dish soap. Avoid abrasive scrub sponges, bleach, or harsh chemical sprays.
When refacing or replacement makes more sense
Painting is effective for structurally sound wood or medium-density fiberboard cabinets, but it does not fix underlying physical failures. Refacing or replacing cabinets is practical when structural issues exist.
Cabinets under sinks that have swelled, rotted, or grown mold from long-term water leaks will not hold paint and lack structural integrity. Delaminating particle board boxes cannot be restored simply by applying paint. If the kitchen floor plan is inefficient or lacks necessary storage space, spending labor on painting old cabinet boxes keeps an outdated design. Finally, thermofoil doors with peeling plastic film require complete removal of the plastic layer down to raw fiberboard before painting, which is labor-intensive compared to purchasing replacement door slabs.
Frequently asked questions
How long do painted kitchen cabinets take to fully cure?
Longer than they take to dry. Many cabinet enamels can be handled and rehung within a few days but need weeks to reach full hardness. The label gives the figures for that product. Until then, treat the doors gently, skip scrubbing and keep damp towels off them.
Do you need to sand kitchen cabinets before painting?
Yes, scuff sanding is mandatory even when using bonding primers. Sanding breaks the gloss of the existing varnish or finish, creating a physical mechanical bond for the primer. Skipping this step often causes paint to flake off near handles and hinges later.
Can you paint over deep oak grain without seeing texture?
Painting over oak covers the color, but the heavy pore pattern will still show through. To get a smooth surface, fill the grain with a dedicated wood grain filler or multiple coats of high-build primer sanded flat before painting. Without grain filler, the distinctive oak texture remains visible under the topcoat.
Is spraying better than using a brush and roller for cabinets?
Spraying provides the smoothest finish without brush marks or stipple texture. However, brushing and rolling require less masking setup and produce excellent results if you use self-leveling urethane enamel paint. The choice depends on your workspace, budget, and comfort level with spray equipment.